Even though I had felt the board was finished I have added three half buried blue foam rocks to the sides of the board. In normal circumstances I would have chosen to have stuck down three actual stones (from the garden) with a hot glue gun. However, I felt that this would have been against the theme of these posts - detailing as they do 'working with foam.'
I decided to use blue foam. Some foam off-cuts were roughly cut to shape with a large 'snap-off' bladed knife and then sanded smooth, before having a stone impressed into the foam. Once I was happy with the shape and texture the foam rocks were stuck down and the groundwork blended-in with DAS modelling clay.
Photo One - Here you see the blue foam rocks added but still awaiting 'full' texturing.
 Photo Two - In this image you can see how the blue foam has been further textured and 'bedded-in' with DAS.
 In addition I added a small resin casting of Greek urns to the front right of the board. Once again, I used DAS to 'bed-in' this piece.
 Photo Three - Shows the resin urns and (in the background) the foam rocks.
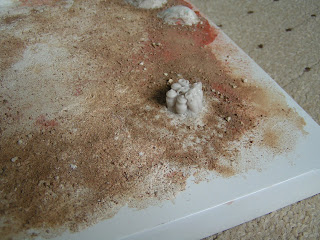 Photo Four - I used some spare craft paint and a large stiff brush to paint the first and basecoat colour.
 Photo Five - The first of the many highlights or drybrushed layers.
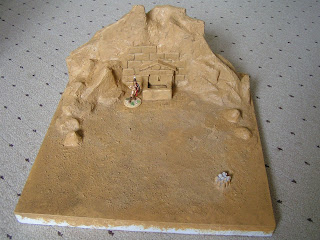 Photo Six - More highlighting.
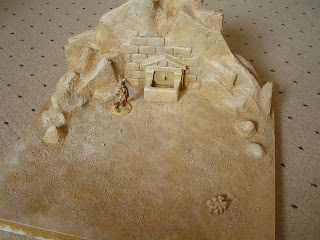 Photo Seven - The final highlight of pure tube acrylic Titanium White drybrushed over the very highest points. I have also finished off the well/fountain by painting the standing water first Midnight Blue then Royal Blue. the fountain head has been painted Scorched Brown, then highlighted in GW Metallic paints.
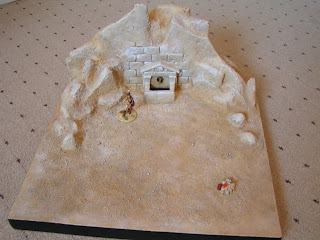 Photo Eight - I have 'washed the main stone and rock areas with a 'dirty black/brown wash' and highlighted the extreme edges of the stone blocks and well with Titanium White.
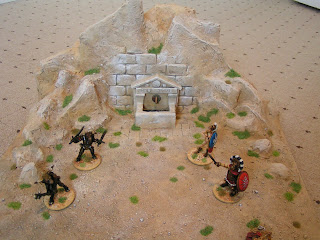 Photo Nine - A picture of the finished board decorated with some of my 40mm Ancient Greek/Greek Mythology miniatures to give an idea of the size of this display piece. The board is 340mm x 340mm.
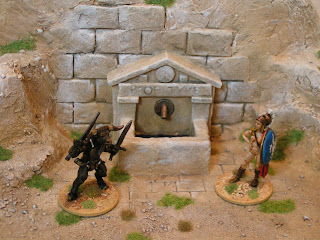
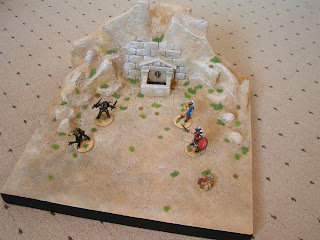 Photo Ten - A close-up of the well/fountain.
 I hope you have enjoyed this short tutorial as much as I enjoyed building it. In addition I am pleased that I have been able to demonstrate some of the techniques that I regularly use when working with foam.
 Photo Three - Shows the resin urns and (in the background) the foam rocks.
 Photo Four - I used some spare craft paint and a large stiff brush to paint the first and basecoat colour.
 Photo Five - The first of the many highlights or drybrushed layers.
 Photo Six - More highlighting.
 Photo Seven - The final highlight of pure tube acrylic Titanium White drybrushed over the very highest points. I have also finished off the well/fountain by painting the standing water first Midnight Blue then Royal Blue. the fountain head has been painted Scorched Brown, then highlighted in GW Metallic paints.
 Photo Eight - I have 'washed the main stone and rock areas with a 'dirty black/brown wash' and highlighted the extreme edges of the stone blocks and well with Titanium White.
 The board edges were painted Chaos Black and the whole piece was then painted with galleria Acrylic Matt varnish. While the varnish was still wet I sprinkled some fine sand over the groundwork in an attempt to add both 'colour' and texture.
Finally I have added a variety of static grass and tufts to the groundwork.
 Photo Nine - A picture of the finished board decorated with some of my 40mm Ancient Greek/Greek Mythology miniatures to give an idea of the size of this display piece. The board is 340mm x 340mm.
 Photo Ten - A close-up of the well/fountain.
 I hope you have enjoyed this short tutorial as much as I enjoyed building it. In addition I am pleased that I have been able to demonstrate some of the techniques that I regularly use when working with foam.
The simple and small blue foam well or fountain grew into this display piece which I now plan on using as a backdrop when I photograph my 40mm Greek figures.
Tony


4 comments:
Nice work, Tony
That looks fantastic Tony. Well done indeed and thanks for the tutorial, I always enjoy them
Thanks so much for these foam tutorials Tony. I've learned so much from them.
Thank you so much!
That is a cracking looking piece!!!! Great stuff this blue foam...btw..I´ve now got shares in the company :-D
Cheers
paul
Post a Comment